Today was Edward's first the first Pinewood Derby Car Race as a Cub Scout. We did this project together and had a ton of fun doing it. Before starting the design of the car, we watched a ton of youtube videos (
such as this and many more) and rad bunch of articles on how to build a fast car and it all seemed very simple (and fun). I can't wait next year race - our CubScout Pack decided to have dad's car race the night before kids :-). Before I go into details - here is the final car we've had - it took 1st place in design as voted by scouts. as far as speed - well, it could have done better - and I will tell you why as I know what we will do next year :-).

According to "
sources" the proper way to build a fast Pinewood Derby Car is to do these few things:
In our car we have implemented #1, #3 (kinda), #4, #5, #6. We did not do #2 as it was against the rules to modify the wheels and we did not do #7 because the rules prevented changes to the wheel base, etc. We also decided to sacrifice some of the #3 (aerodynamics) for the esthetics - mainly because we felt our car will be so fast, we can afford some drag :-).
First we decided what overall design we are going to have and together drew the shape of the future car on the paper:
Then we transferred the outline to the wooden block and made rough cuts with the large saw and then some finer cuts with the manual coping saw.
Then we used belt sander to smooth out the rough cut and shape the top of the car. This all was done in a matter of a few minutes - very easy.
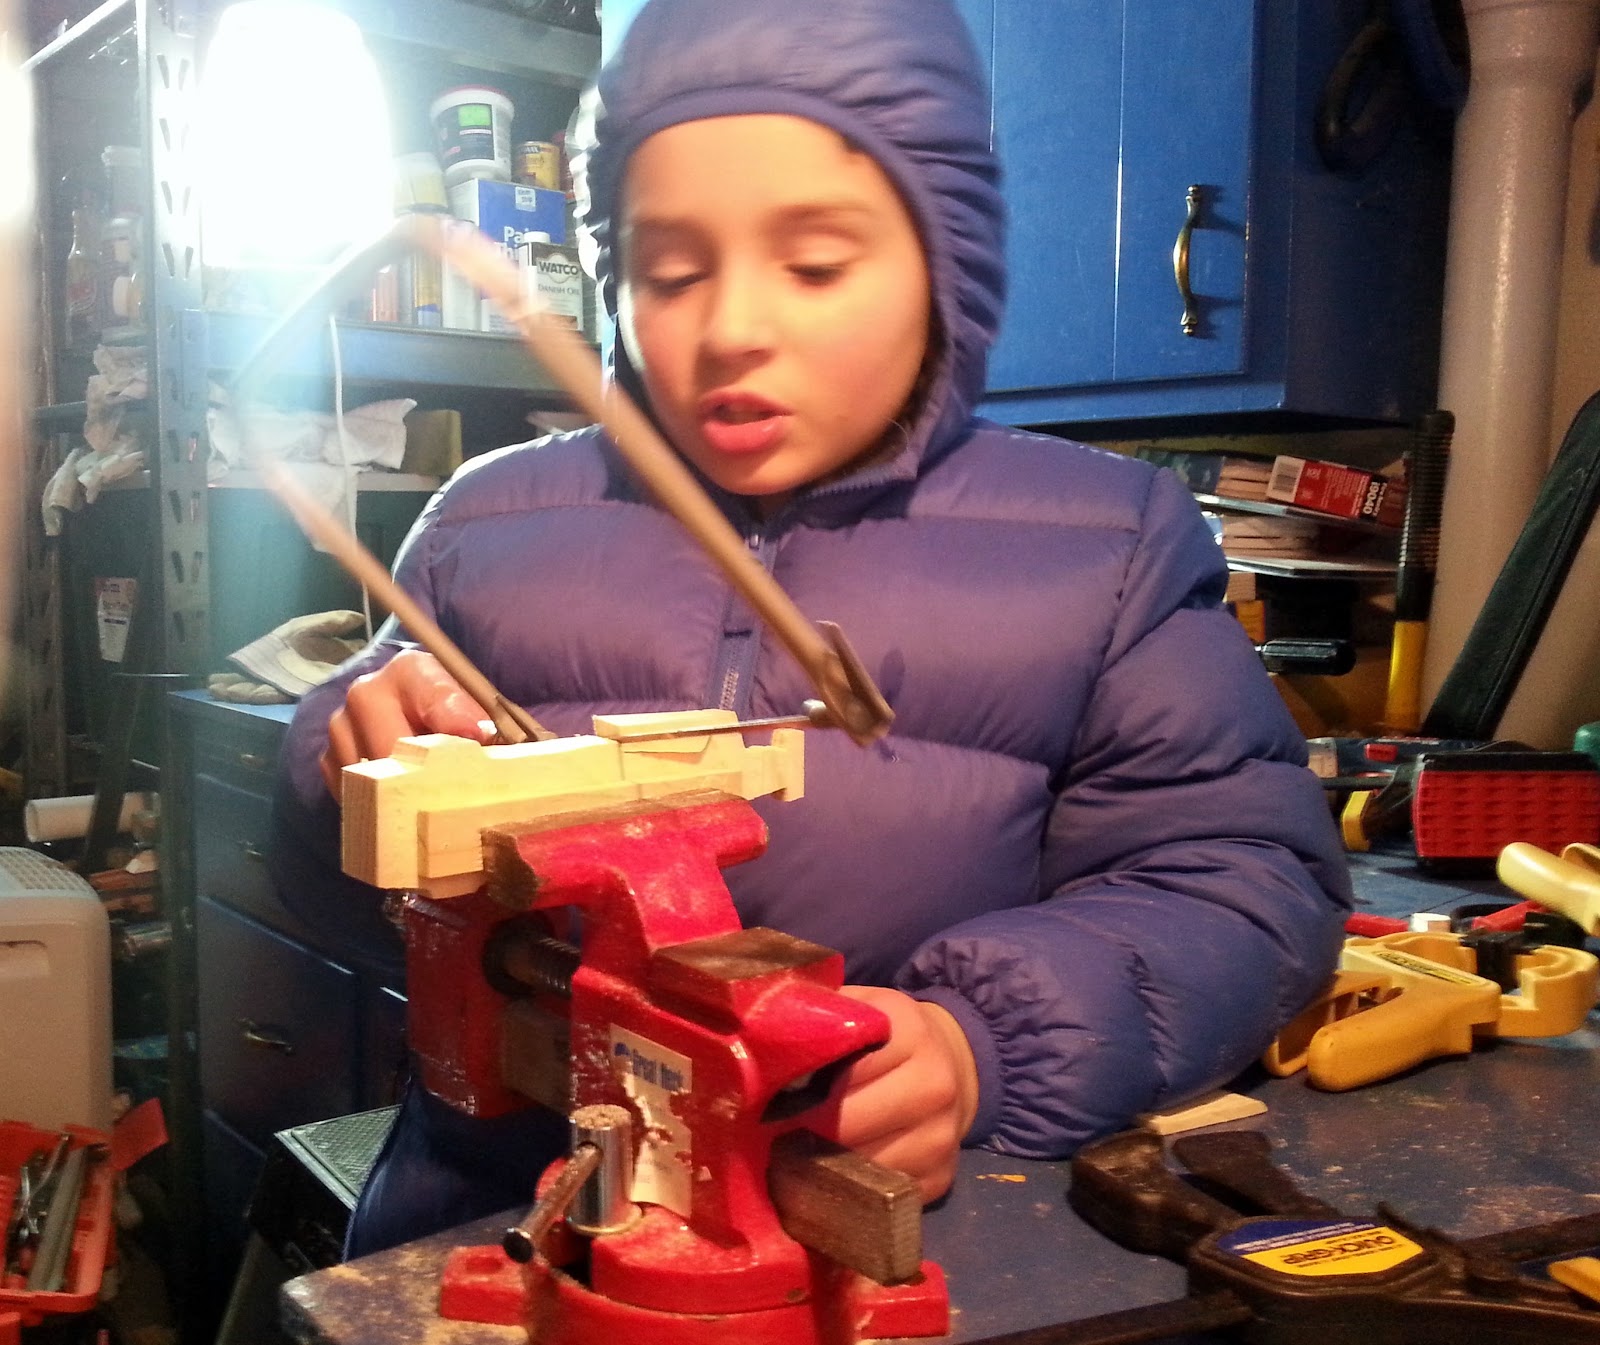
Once we had the outline done, we used the Dremel tool with the sand paper attachment to make finer shape adjustments. This is a bit more delicate work and requires more precision.
Nevertheless, Edward did some of this as well (mostly the bottom part of the car). This Dremel tool can easily ruin your design if you overdo it, but we passed this phase with only few minor mistakes.
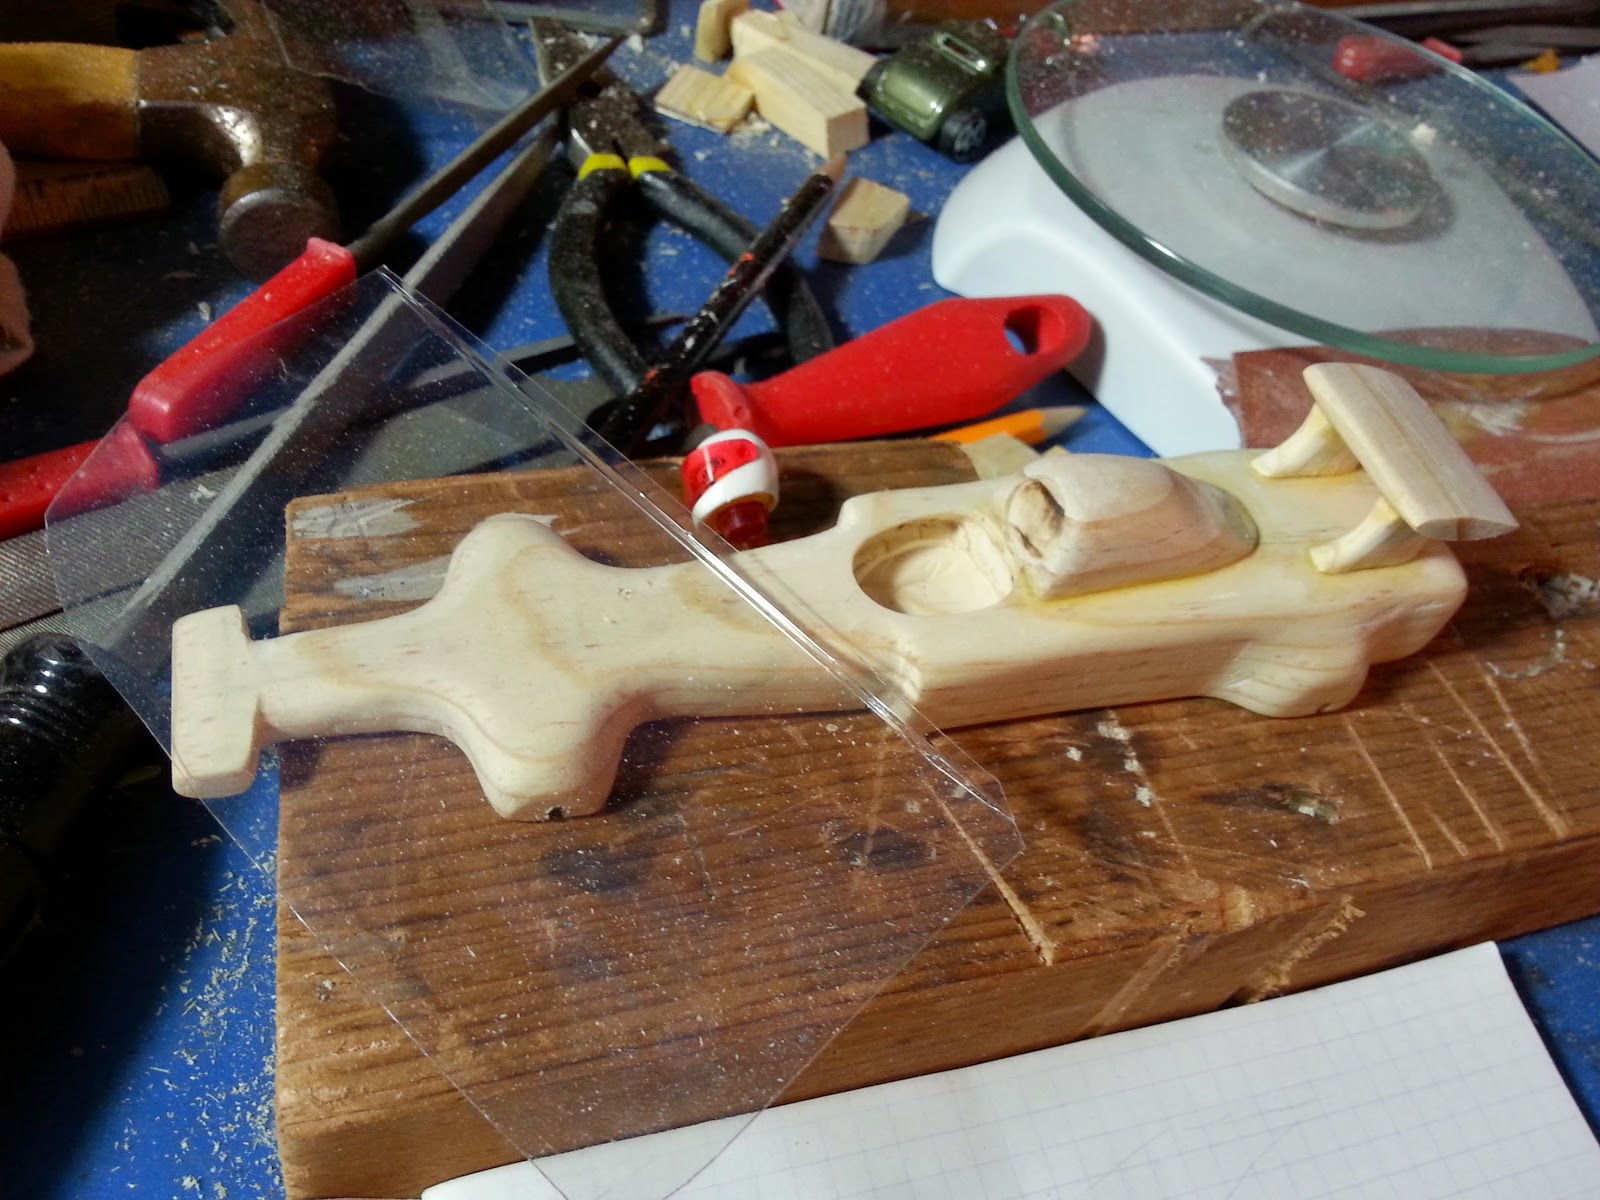
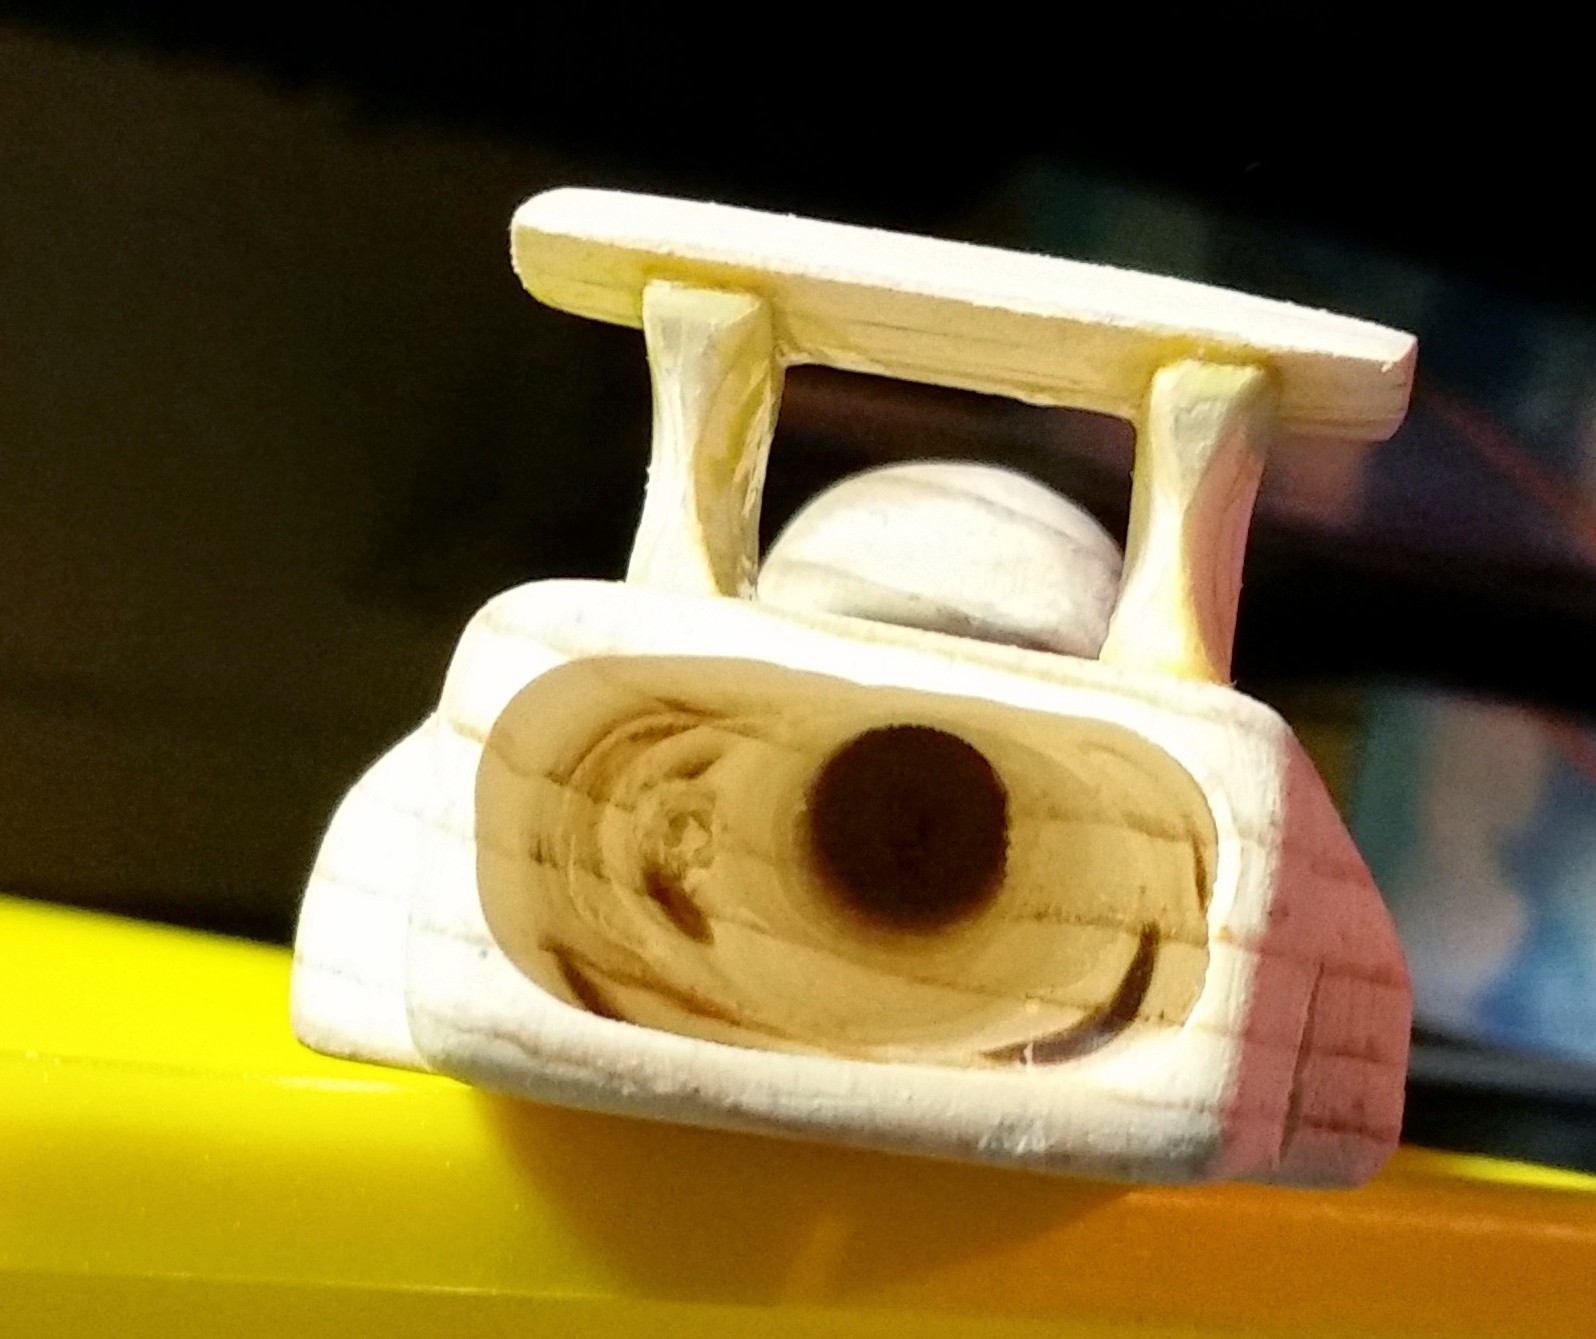
The last part of the body work was to make a hole for the driver and cut our the rear spoiler and glue it onto the body of the car. These things are not very aerodynamic and were done on purpose - we traded of some speed for the "looks". However this is not what kept us from winning the speed race. More about it later (some drama, eh?). we made a windshield out of plastic box from grapes.
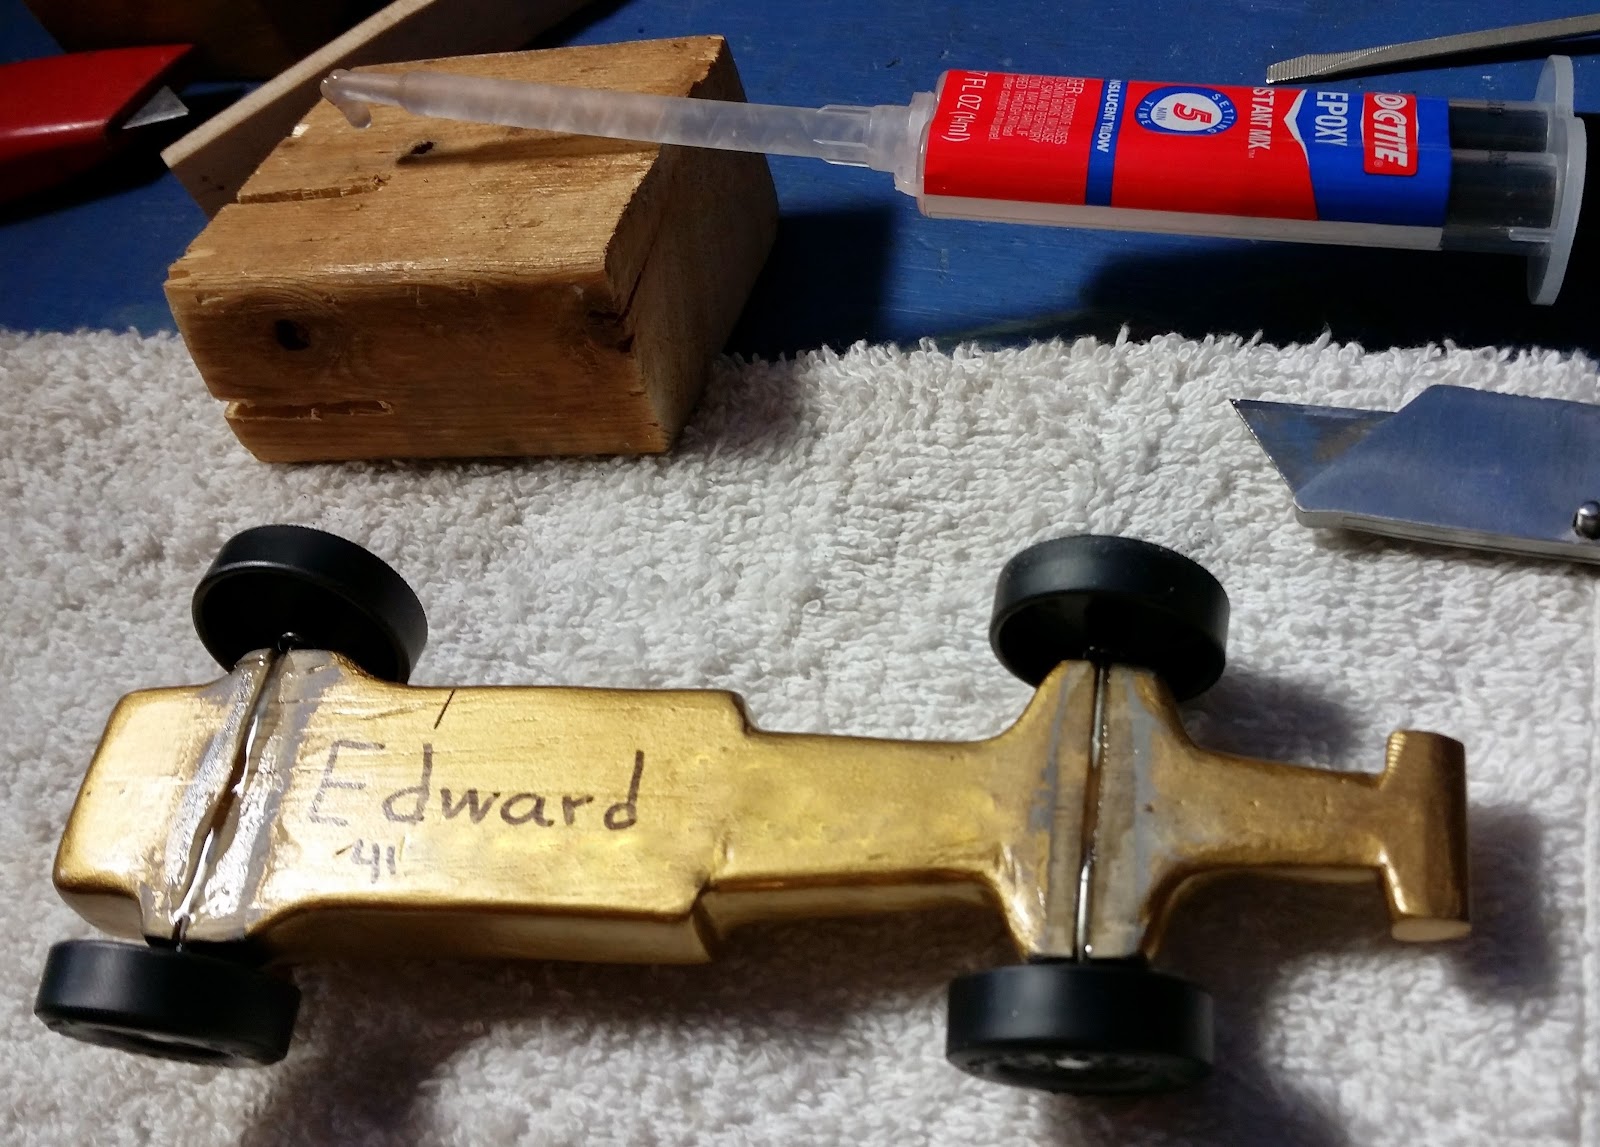
The biggest thing in the Pinewood Derby car is the weight placement. We decided to make an opening in the rear to conceal all the weight - drilled the opening and made it all the way to the driver seat to that the bolt that will go in can also adjust the center of gravity if needed. Plus we can add or remove bolts to add or remove weight - and all of it will be concealed inside.
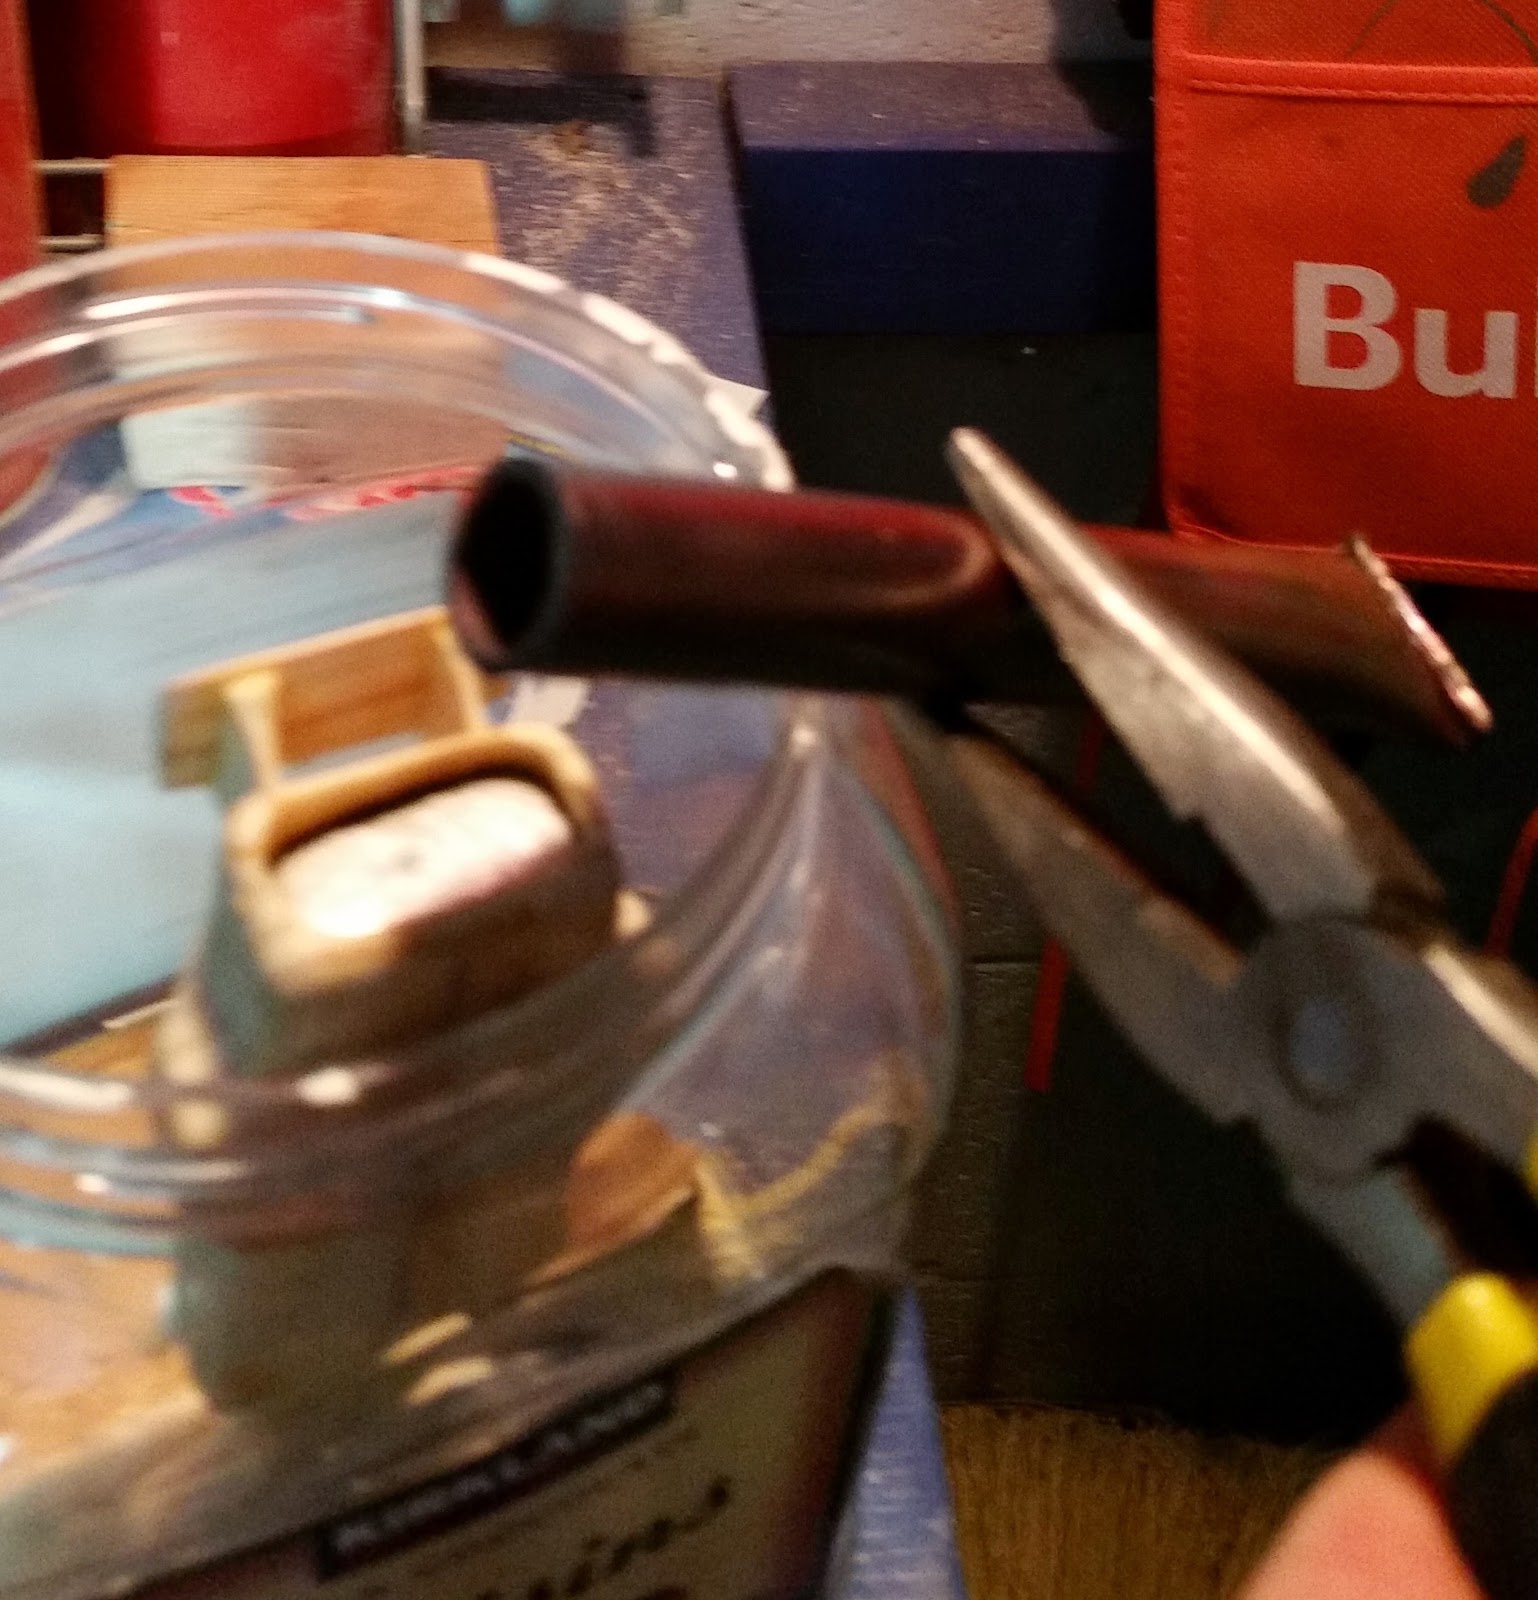
To melt lead I closed one end of the copper pipe, filled it with led (from bb gun pellets - $2.5 per 5 oz box) and heated it with a torch. Then poured it into the opening in the car. The car almost caught on flames - the lead was so hot! We also kept the garage door open and wore face mask to avoid exposure to the lead fumes. Also use protective glasses to avoid potential splashes from hot lead into eyes. This is a risky part of the project, but it worked out very well.
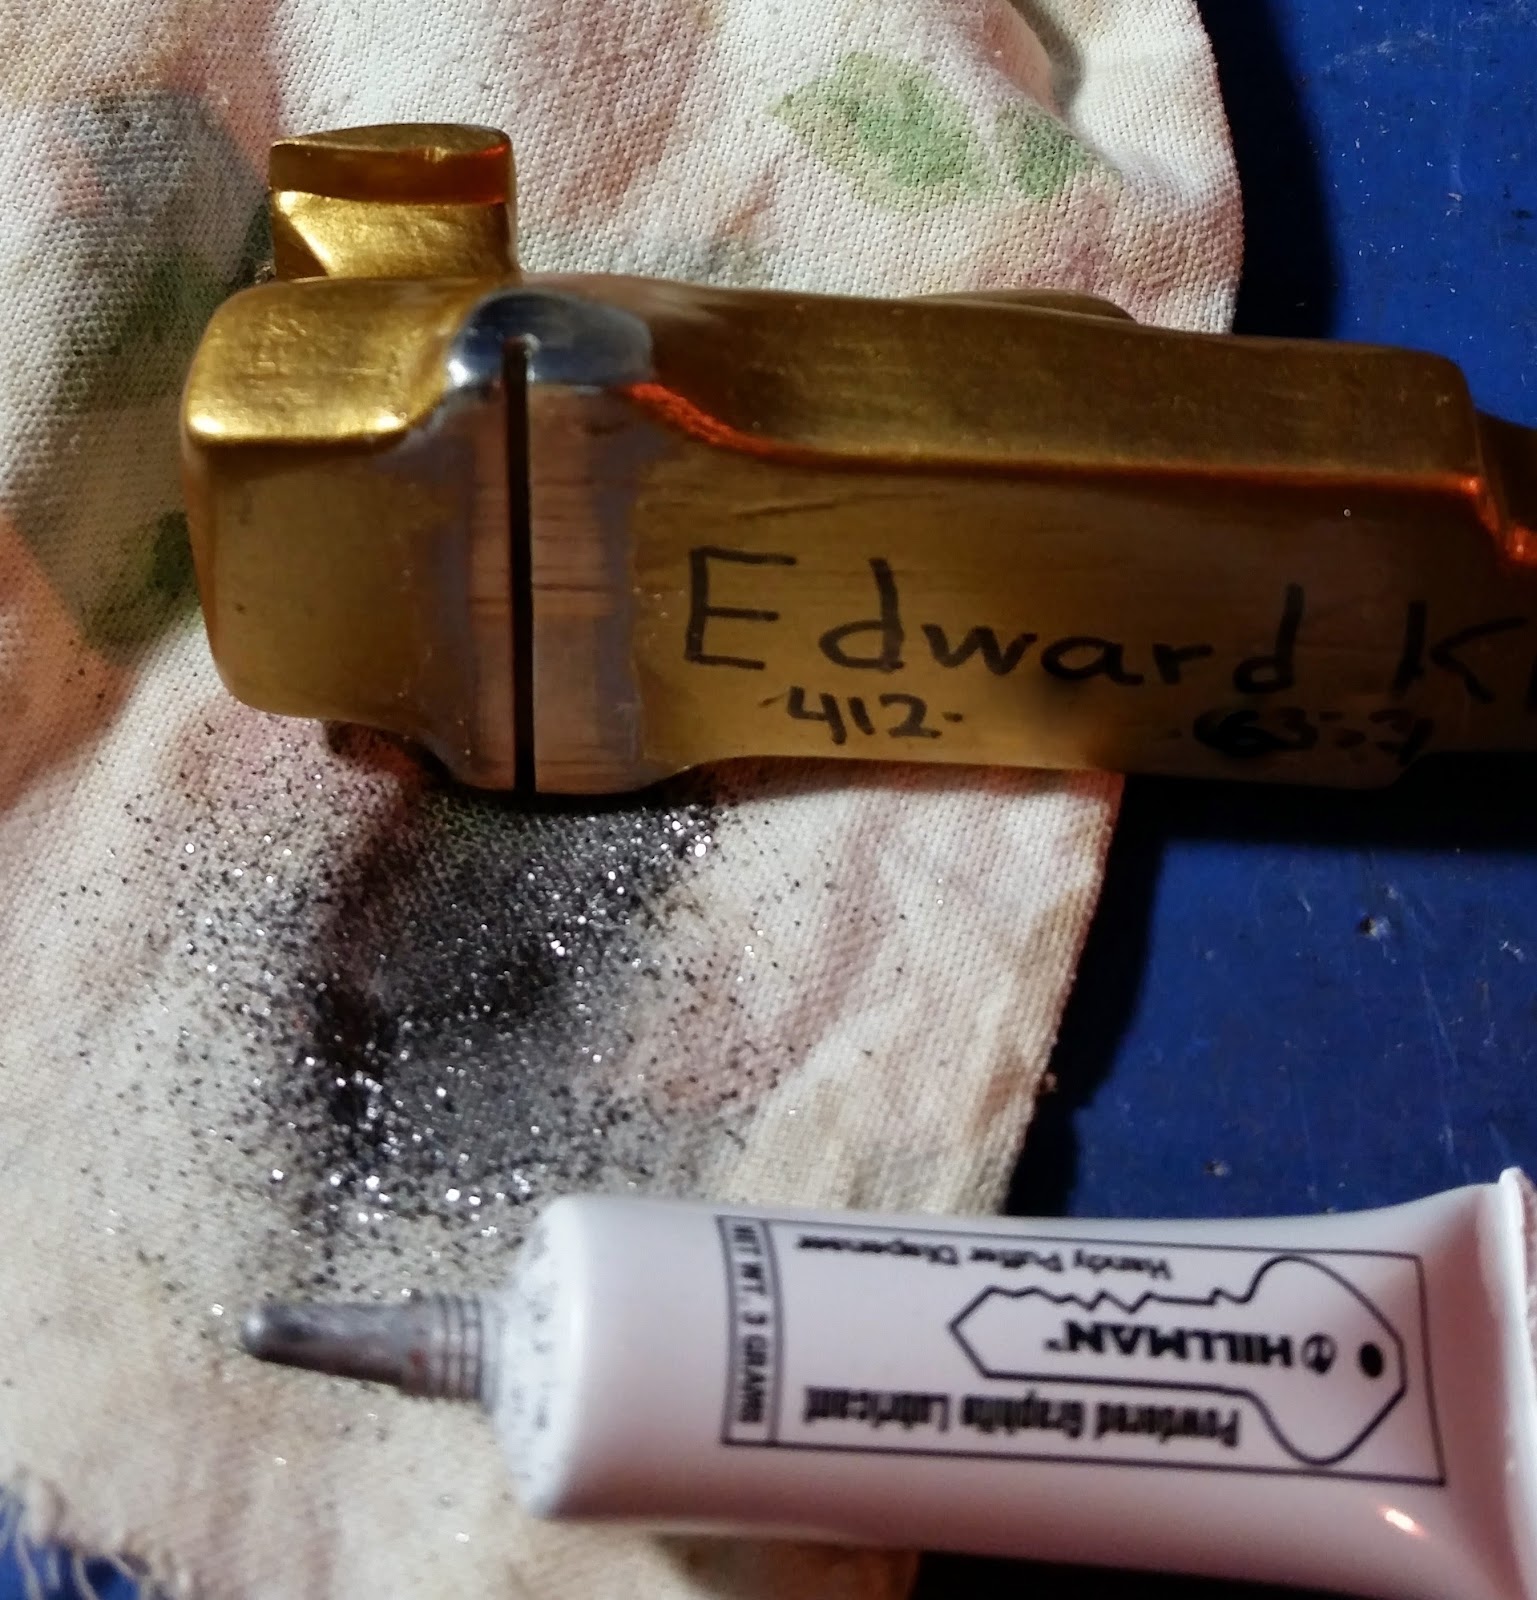
Once lead cooled down, we covered it with about 1/8" of the epoxy glue so nobody will touch the lead and we can sand and pain it. Then I drilled a hole all the way to the driver seat - this is where the bolt for weight and gravity center adjustment will go.
Our center of gravity was 3/4 of an inch in front of rear axle. This is good for smooth track, but may not be great for the track with small bumps as at high speed you can pop front wheels and go off the track. This is why having long hole as shown below is so useful - by using a screw driver I can move the bolt deeper into the car in a matter of seconds without changing the weight of the car, but this can shift my center of gravity in either direction.
BTW - the thread marks you see in the picture below are made by simply drilling the right hole first and then screwing the bolt into it - lead is very soft and bolt makes its own thread.
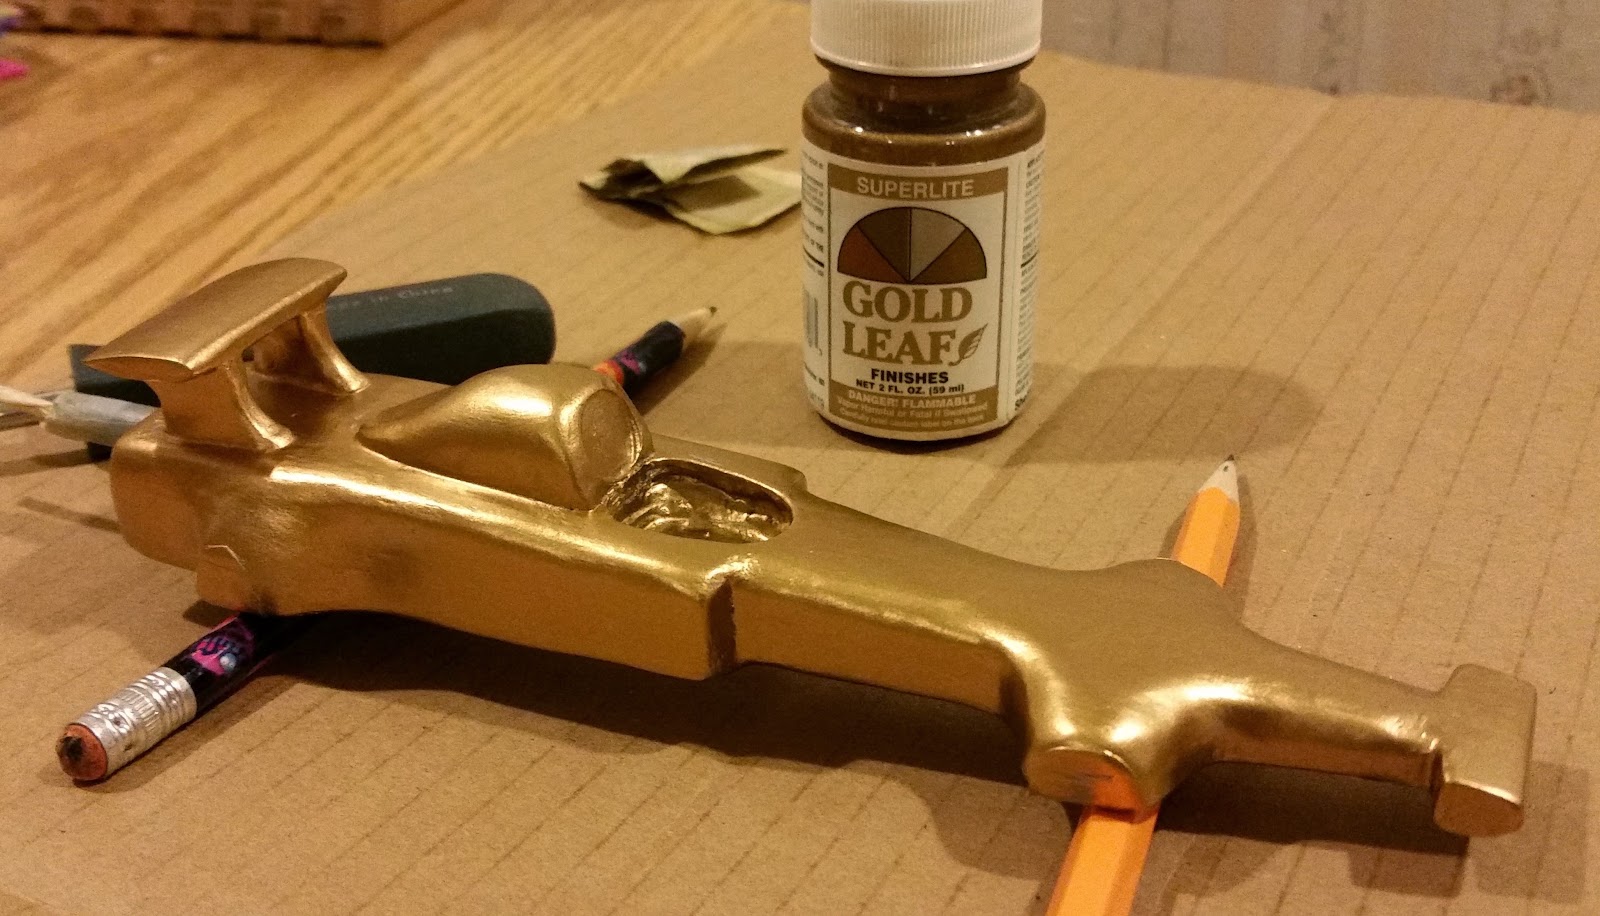
Once all structural work was done we primed the car twice - with sanding of the first layer.
And finally painted it once with gold paint and then drew numbers and letters on the car. Next day we painted it once with polyurethane. Once it was all dry we used car wax for extra polish.
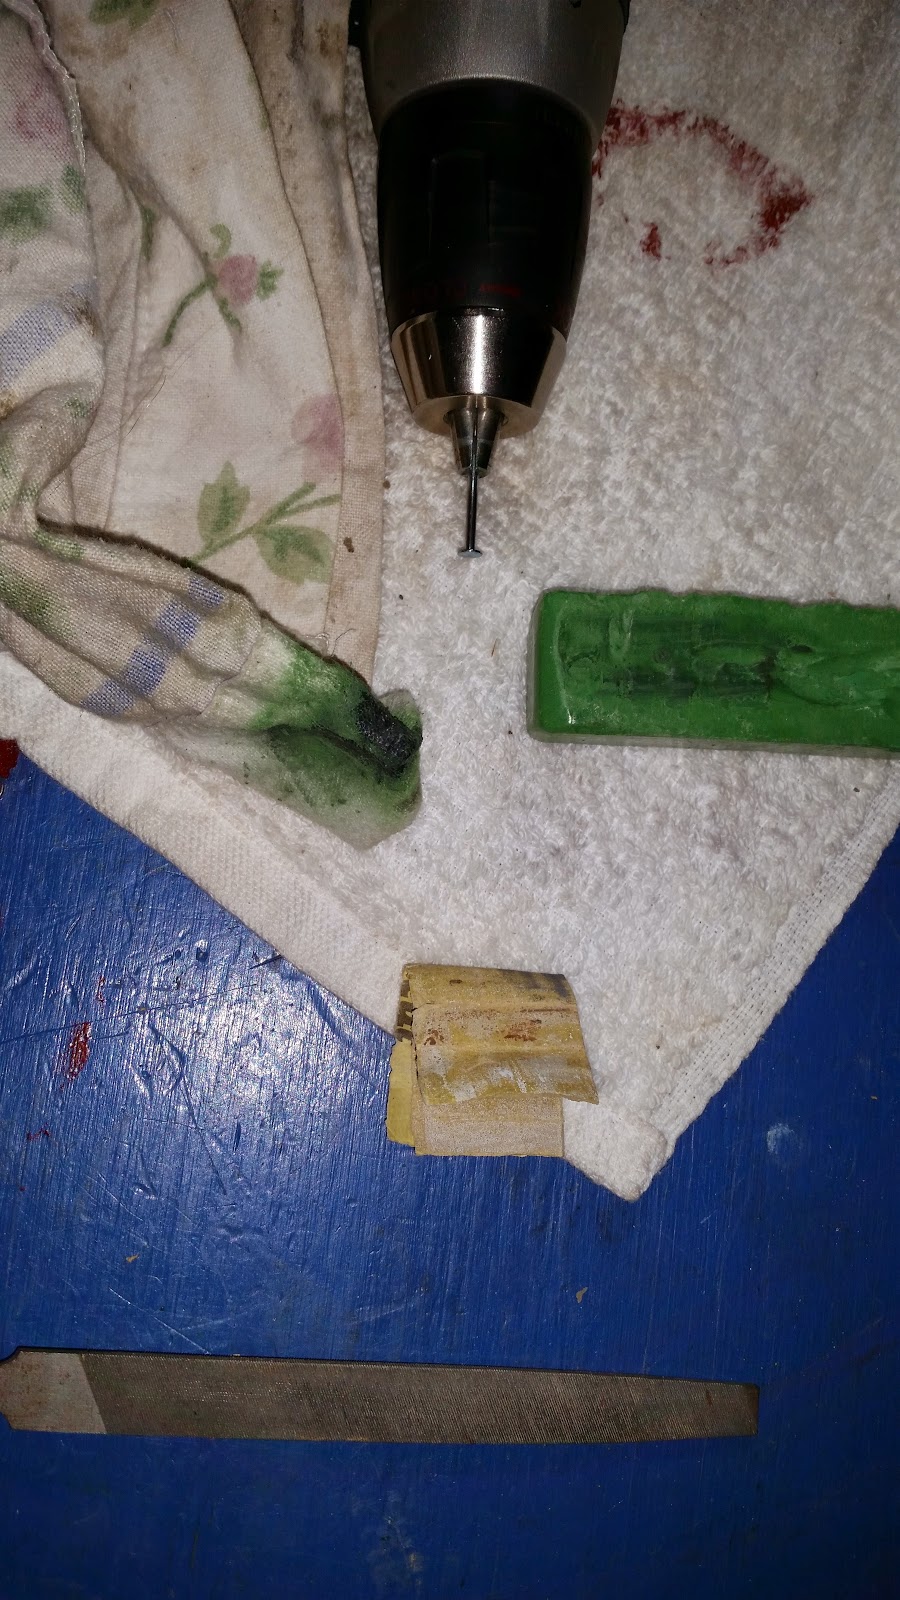
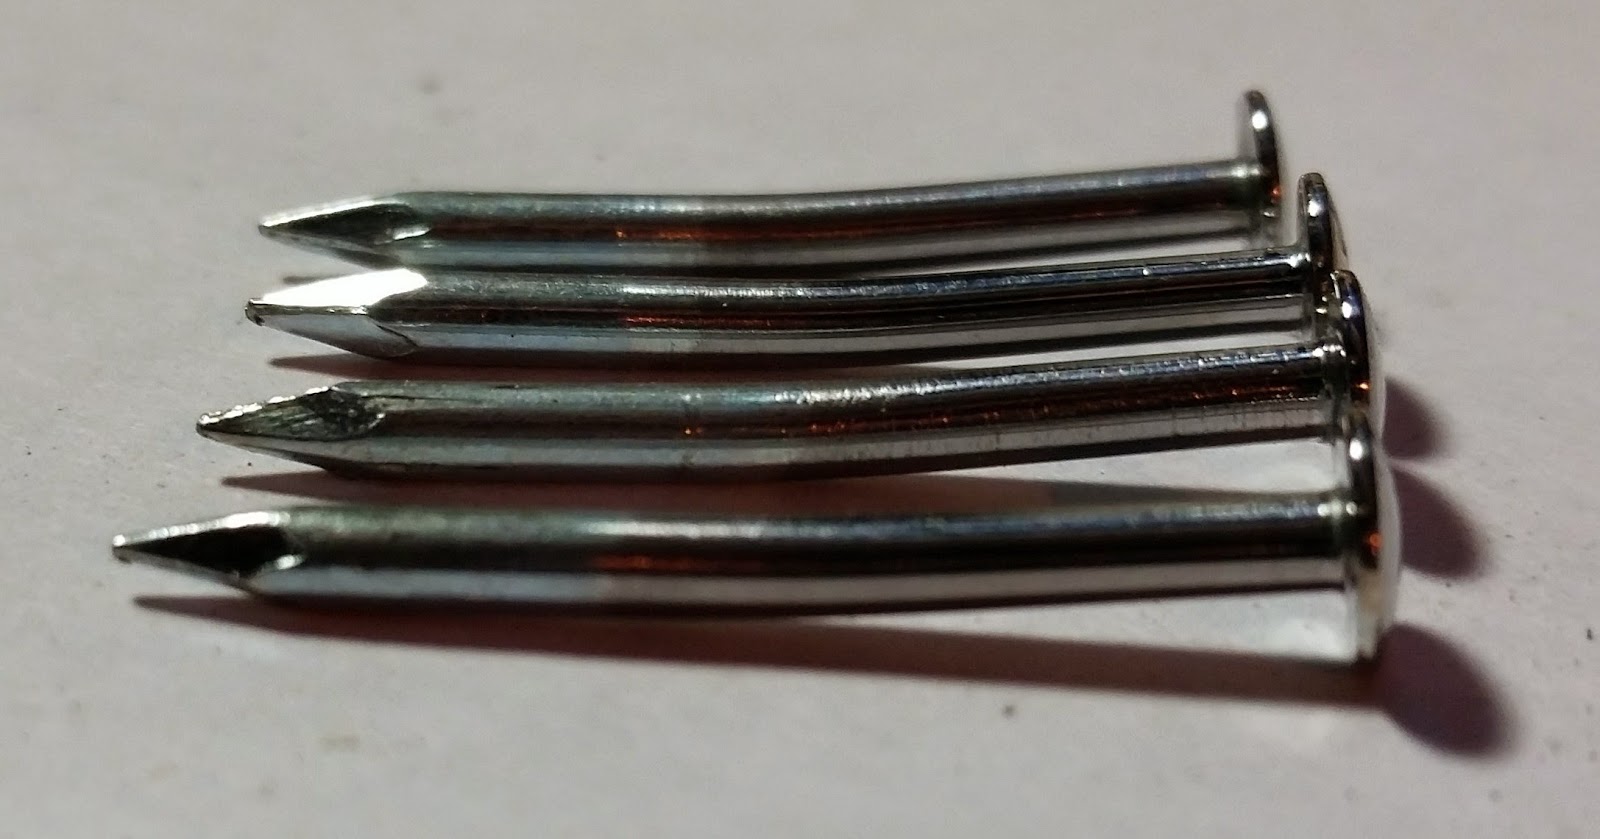
Now it is time to work on wheels. First we worked on polishing the nails. First - put it in the drill and apply file while spinning the nail. After that use sand paper to smooth it out and finally use polishing compound. Once you get the hang of it, it takes less then 10 minutes to polish a nail to mirror finish.
Since we wanted to ride on canted wheels - we had to bend nails to about 2 degree angle. Instead of buying a $100 device to do it, I made my own device from a 2x4" stud. Just make two wide cuts with a regular saw - each cut perpendicular to another, then insert polished nail with its head into one of the slots - with the sharp side of the nail protruding outside of the block of wood by the lenght of the section that needs to be bent. Then tap with a hammer on that protruding part of the nail. Not very precise, but cheap and easy.
The benefit of this approach of bending the nail - vs. holding it with pliers is that soft wood does not scratch polished surface of the nail. And you must bend it after you polish it - you can only polish straight nail. And once you bend it - if you scratch it - you better start with a new nail as polishing bent nail is nearly impossible.
Finally - we polished the sides with graphite, added bunch of graphite into wheels and on nails.
We raised one front wheel so it was about 1/16" above the ground. Before we glued the wheels, we inserted nails and ran tests on the floor to make sure our car does understeering for about 2" over 4 feet - this is for
rail riding. And this is where we made a big mistake! Later on when I did test runs on the track, I saw how this rail riding slows down the car. I do not think next year we are doing rail riding and will make straight rider. After all wheel alignments were done, we use epoxy glue to attach nails.
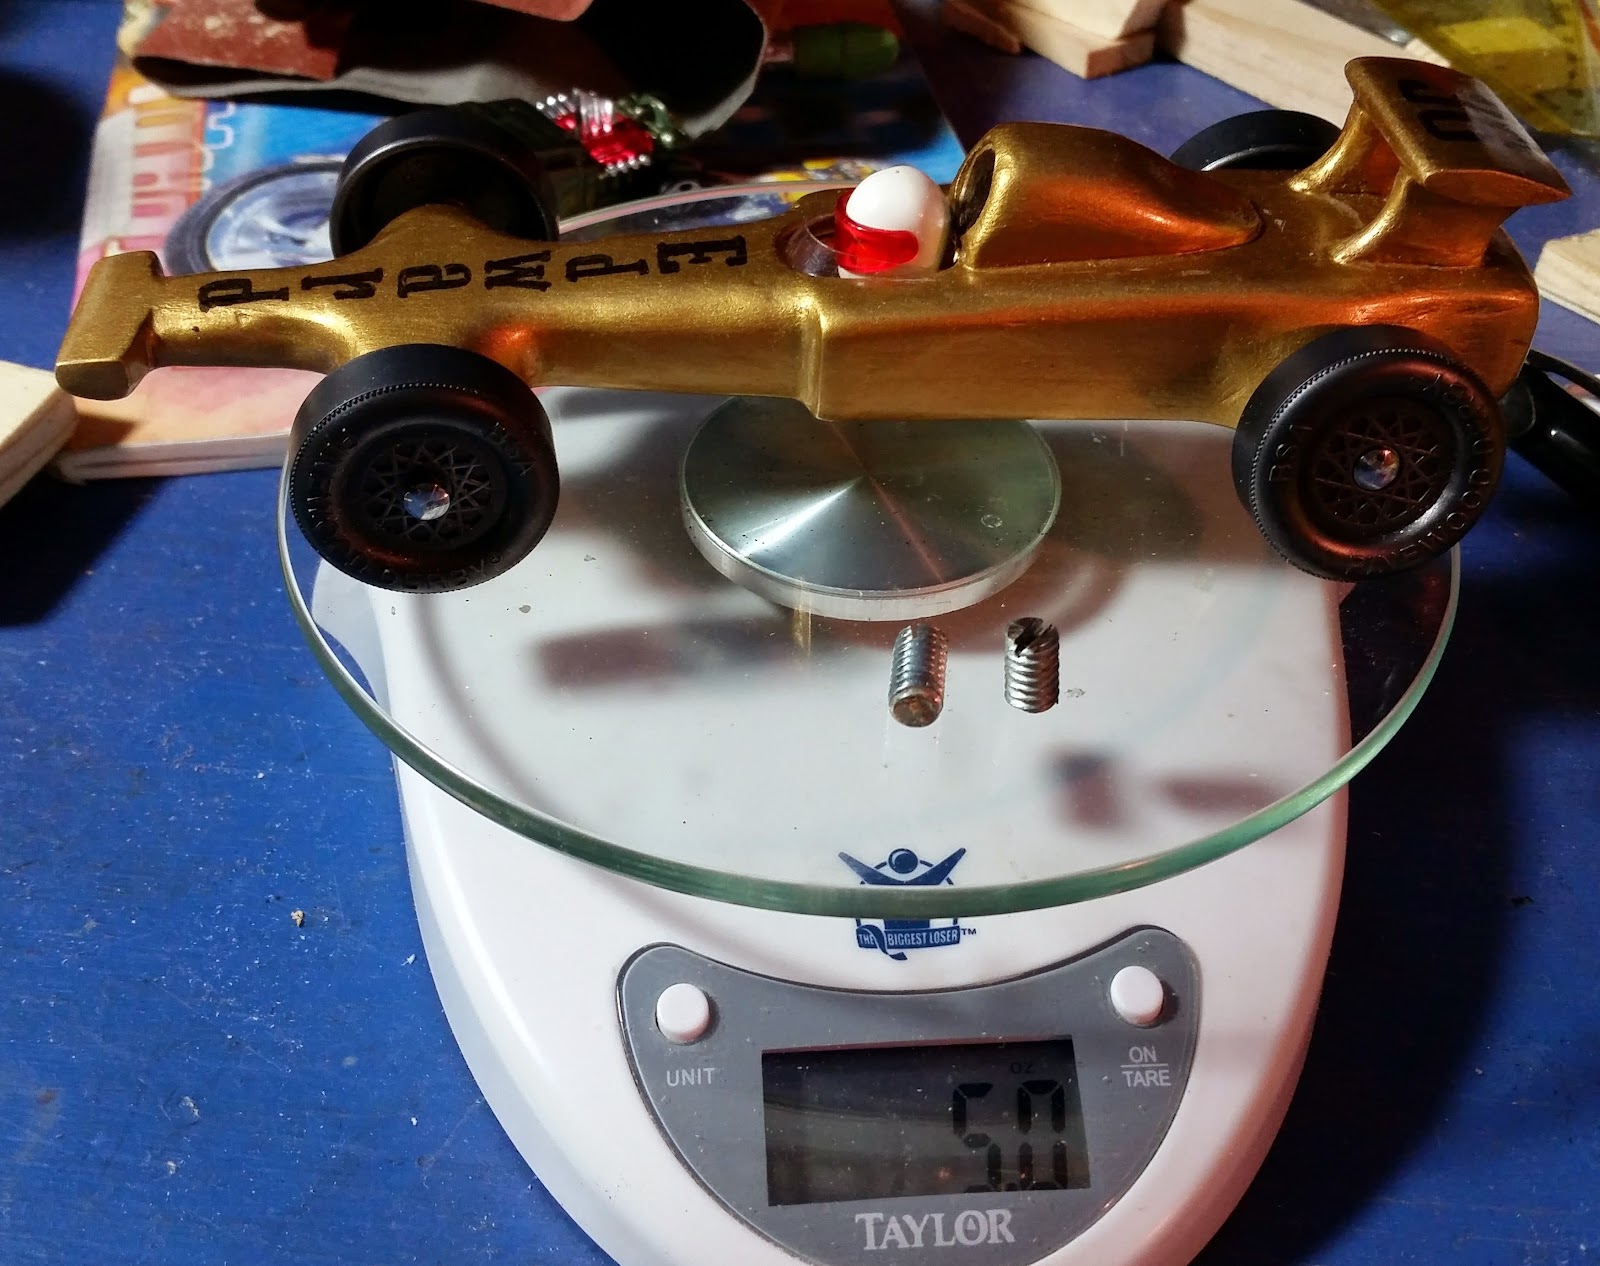
I did not mention, but along every step above, we were constantly weighting the car - so that we would know how much lead to use, what is the impact of paint, nails, wheels and other things on the weight. The point was to build a car that would be 2 or 3 oz lighter than the regulation 5 oz weight and then cut small bolts into short segments (and cut the slot for screw driver). We had about 7 cuts of this bolt of different length (and weight) so we have a choice when getting as close to 5 oz as possible.

These bolt' segments serve 2 purposes. One is to add or remove weight (the race scale can be different from the one we used at home) and Two is to shift center of gravity towards the front or rear as needed - depending how front wheel behave (you do not want those front wheels to pop on a bump). This resulted in our center of gravity being 3/4" in front of the rear wheels. Very fast design.
The entire project took about 10 hours and was ton of fun. We did win the #1 place in design, but were in the middle overall on speed. After the race was over, I did several test runs on the track and it became VERY obvious that our rail riding was slowing the car down by A LOT. It was very easy to spot - I wish we had access to the track when we were doing the tests (before gluing nails to the body). This was a trivial error to avoid, but we did not know simply by not test riding on the track.
The biggest lesson of this is that if we want to win on speed, we need to do test rides on a track. Otherwise it is a gamble and only experimentation can complete the project. The funny thing is that all of the design and construction is 99% of the effort in the project while test riding and adjusting it on the track is 1% of the effort, but it is very critical to achieve high speed.
What will I do differently next year?
- Next year I will avoid rail riding and adjust the wheels so that car rides straight line.
- I will bend nails half the amount of what I did this year (probably about 1 degree)
- While polishing nails, I will use sandpaper up to 1500 grit (see this article for details)
- Pack the wheels densely with graphite and do not run the car after that.
- Make shape totally aerodynamic for maximum speed (and make fancy shape on a separate car - for dad's race)
- Possibly make three different cars with slightly different designs and have them compete in my garage to deserve the race?
- Make my own short track out of wood and cut grooves with rotary tool - and test test test the car!
Here is the concept car design for the 2016 race - we plan on making a wind tunnel to test aerodynamics and short test track to make sure it rides fast.